Weekly Art Practice - Week 27
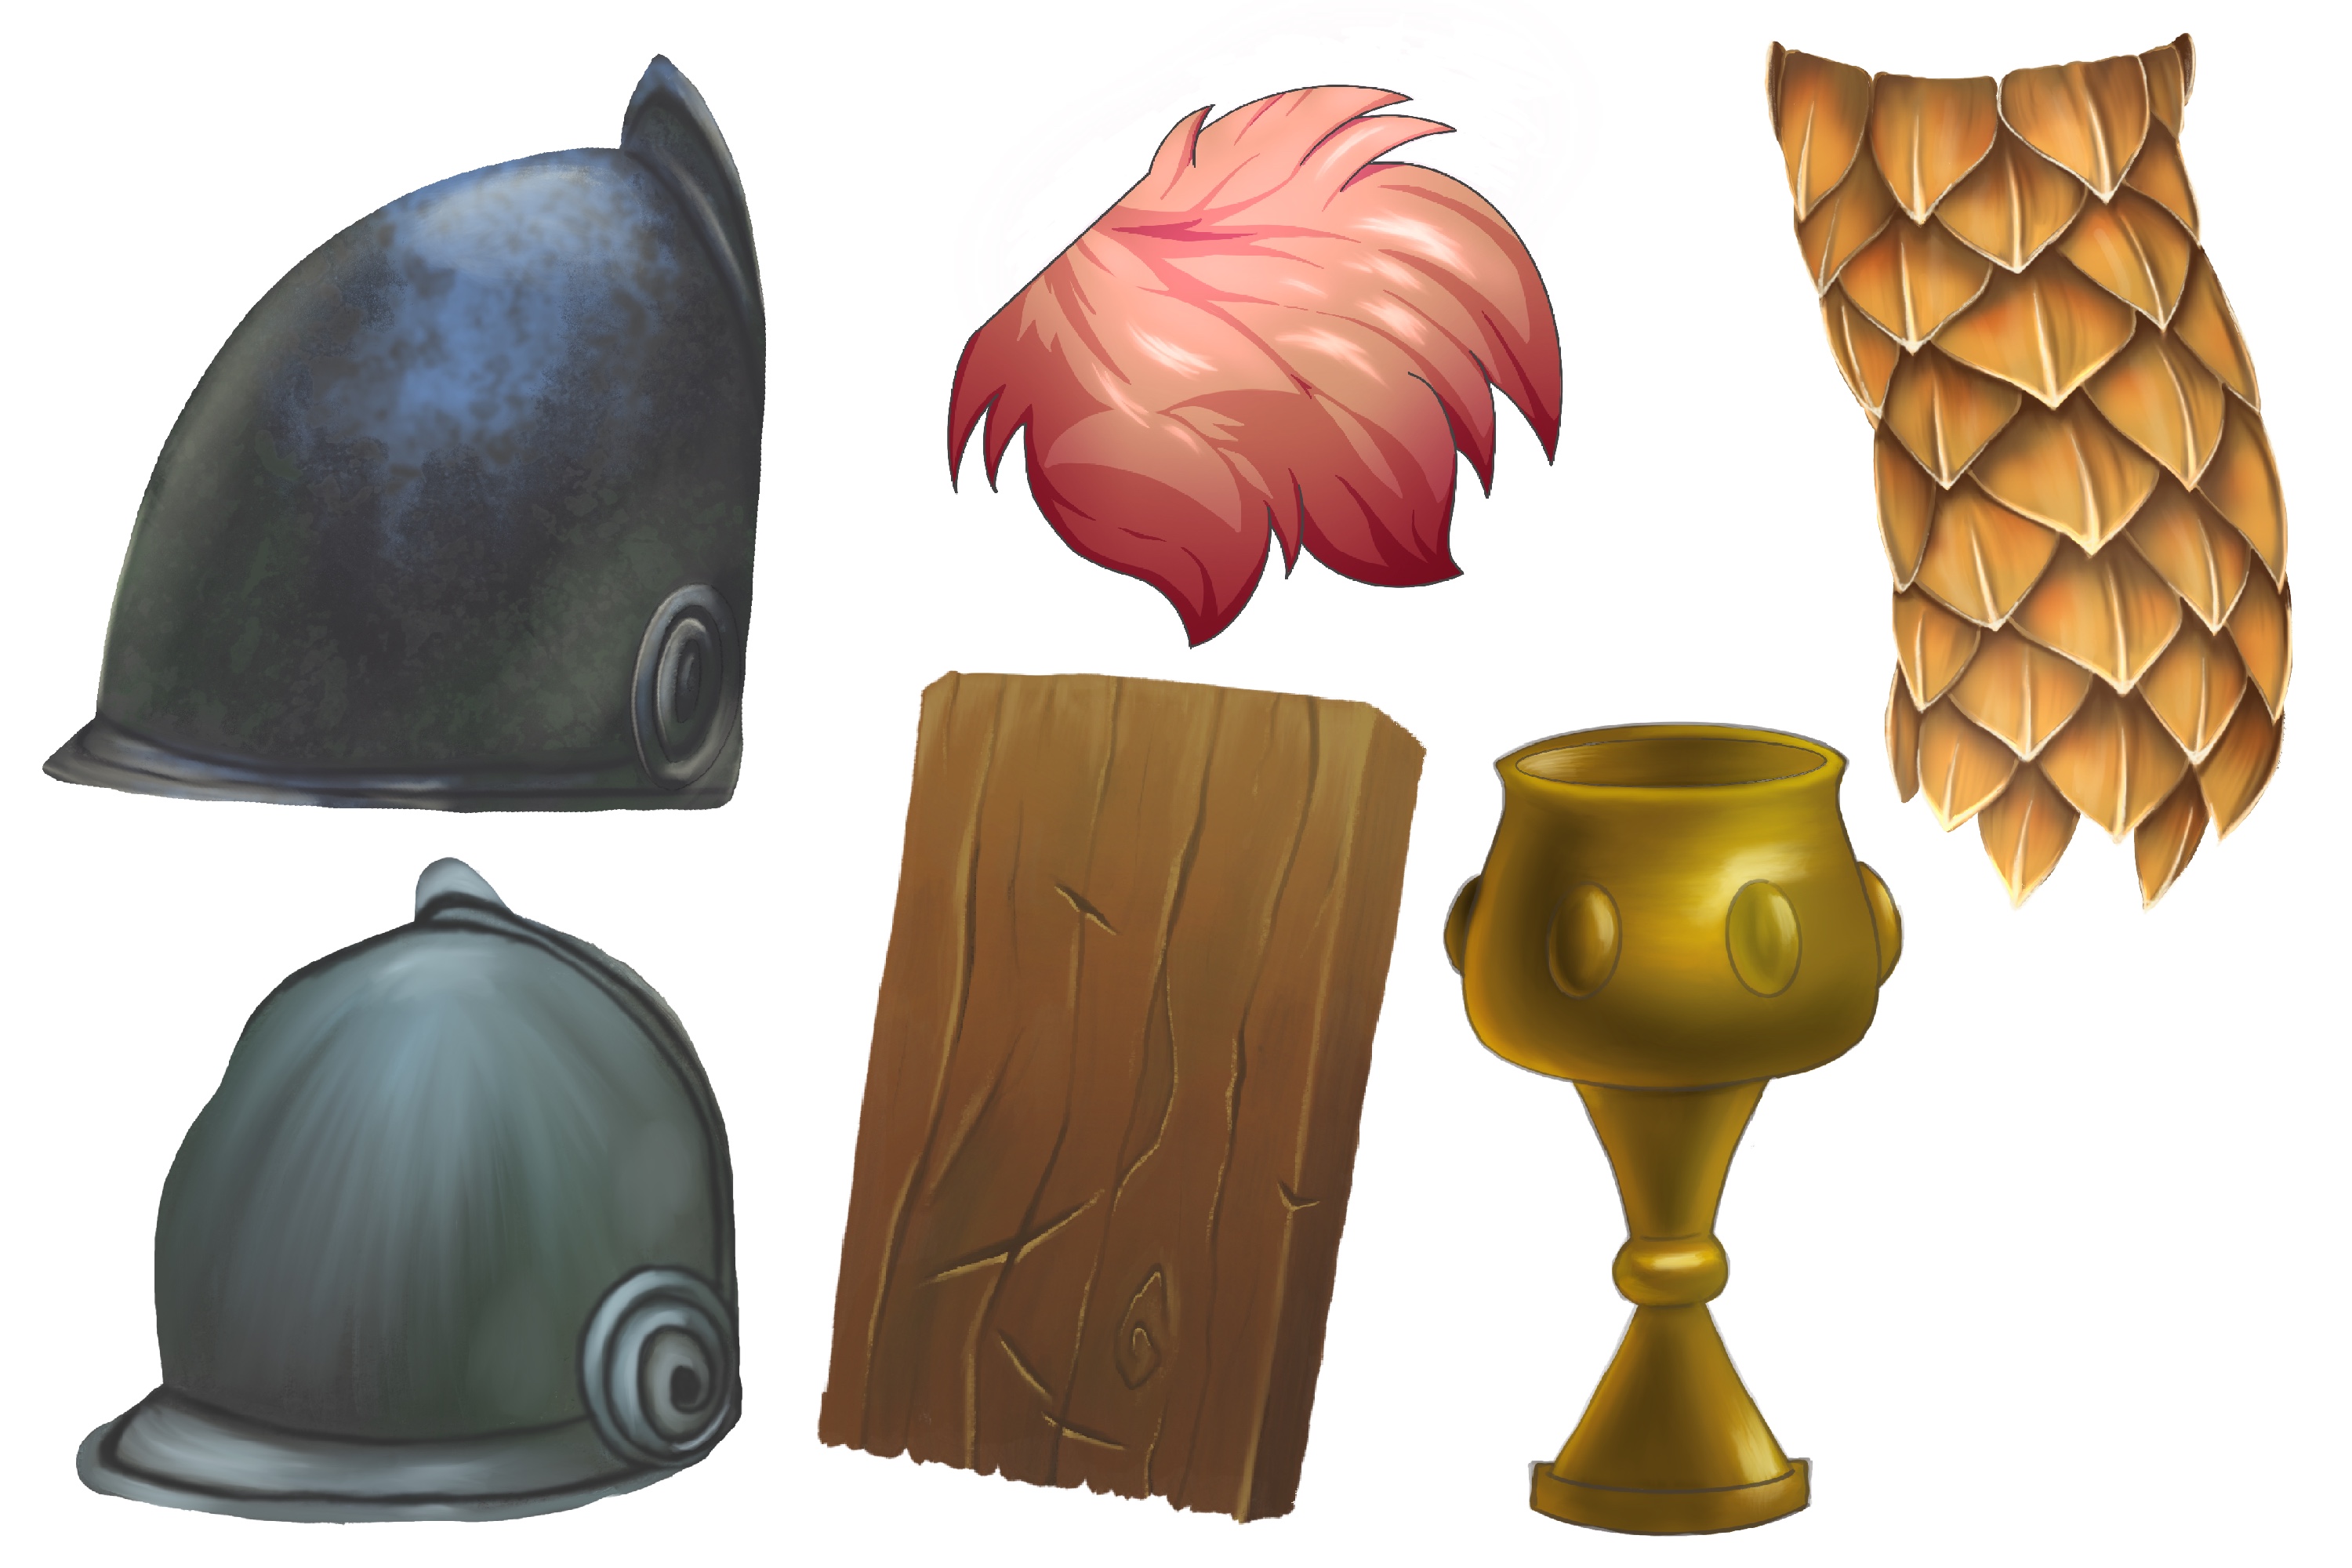
This week's study theme was inspired from the One Week Character challenge I did a few months ago. The instructure spent a decent amount of time talking about material painting and using it to livin up your character's look. I struggled with the focus on metal as I didn’t feel like I had enough time in the 1 day devoted to materials to really learn, and instead just ended up trying to fake it. But after that I added Material Studies to my list of upcoming WAPs, and now we finally got there.
I started by gathering up material step-by-step guides I could find on Pinterest. The most common ones are gold and metal, but the metadata on these things isn’t great so it was hard to keep searching for more, broader themes. Out of the ones I found I choose 5 that feel like decent beginner materials, by which I probably mean most common. I also choose ones that had the most understandable guides, preferring ones that also had text that explained the steps.
Day 1 - Wood
I find wood rather intimidating to paint, I suspect others do too as it’s very easy to find a brush to do the effect. It’s my go-to move for Altar Stone videos or other backgrounds where I need to do a large piece of wood because the idea of drawing all the needed lines is exhausting. But that’s what we did on day 1.
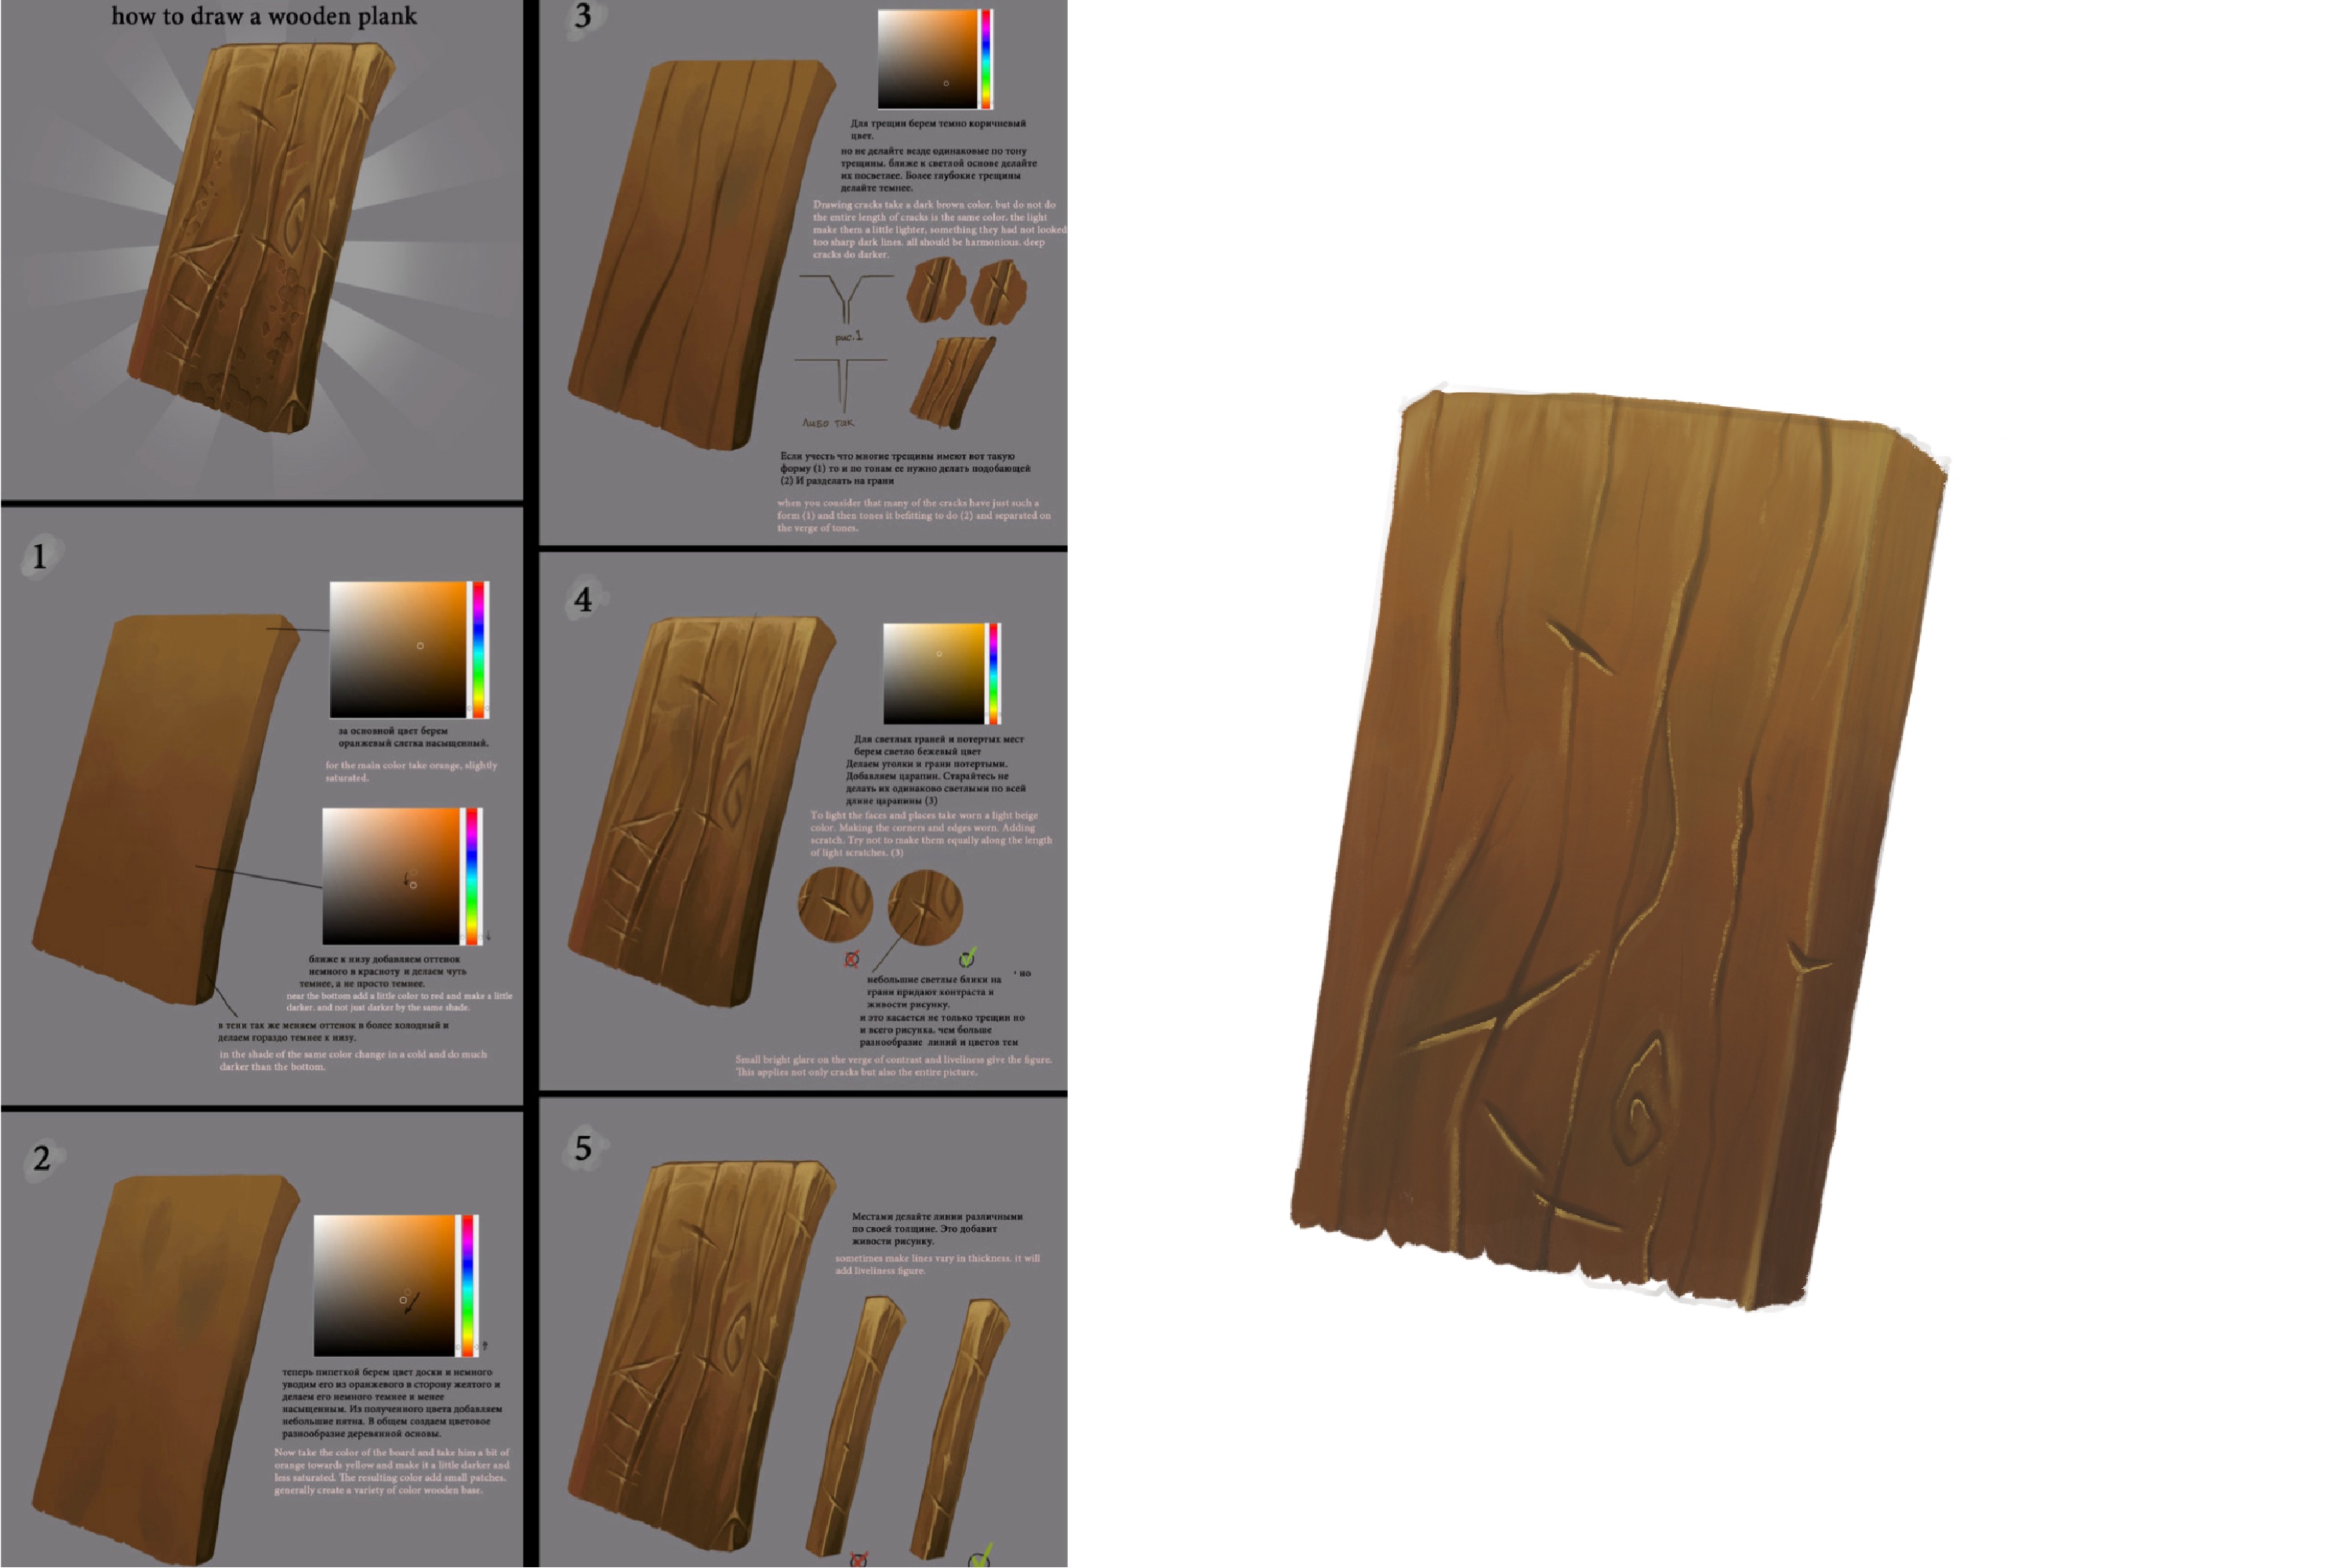
I’m very happy with how this went, even though I did get lost in the steps for a while. The instructions could be more clear. I didn’t add as many scratches but that was mostly because I felt like the ones I did do were enough to learn what was going on. This piece also came together rather quickly which was a nice discovery, making the idea of doing hand drawn wood objects in the future less daunting.
Wood tutorial by Gimaldinov. I found this version of the tutorial while putting the blog post together and now I see that there were more steps! I didn’t know about the last few!
Day 2 - Gold
Gold felt pretty straight forward and was the fastest of the bunch. I do feel like I’ve lost some texture and I could have pushed the highlights harder.
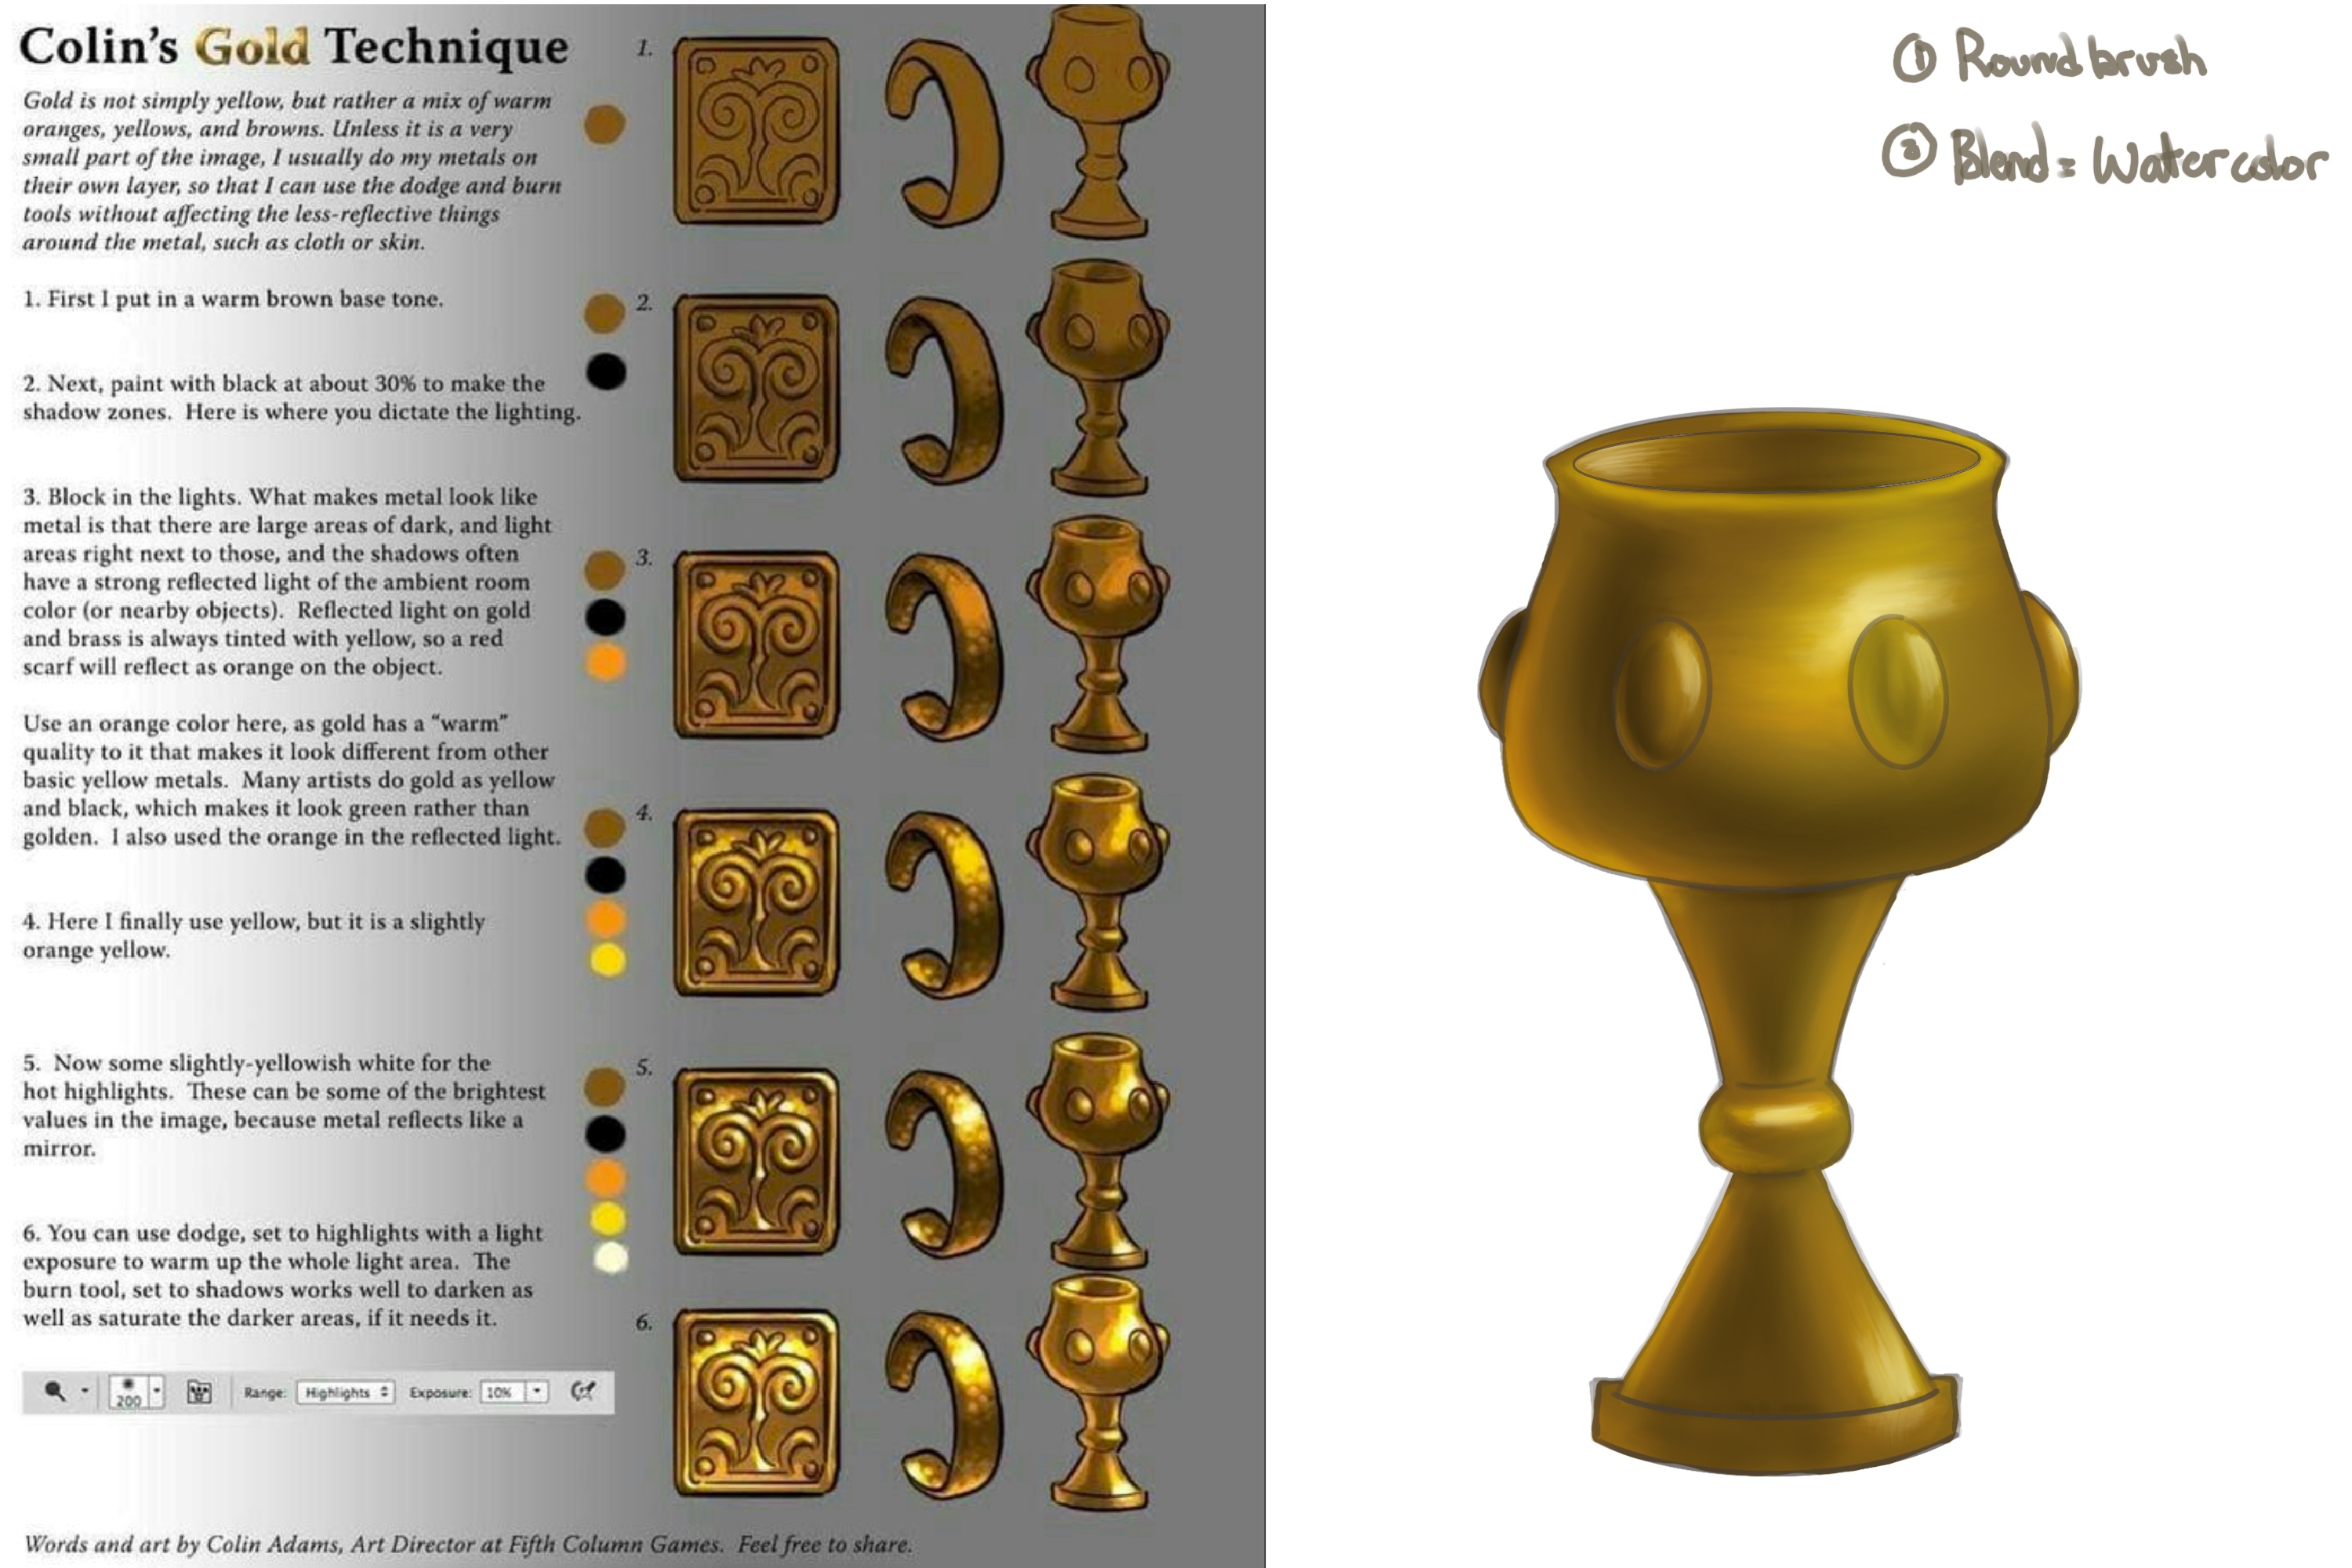
Gold tutorial by Colin Adams.
Day 3 - Metal
I hesitated on doing metal and gold on back to back days, thinking they would feel too similar. But I tried to focus on fixing the texture problem which led to some impressive results. At least after my first attempt which turned into a smudged mess.
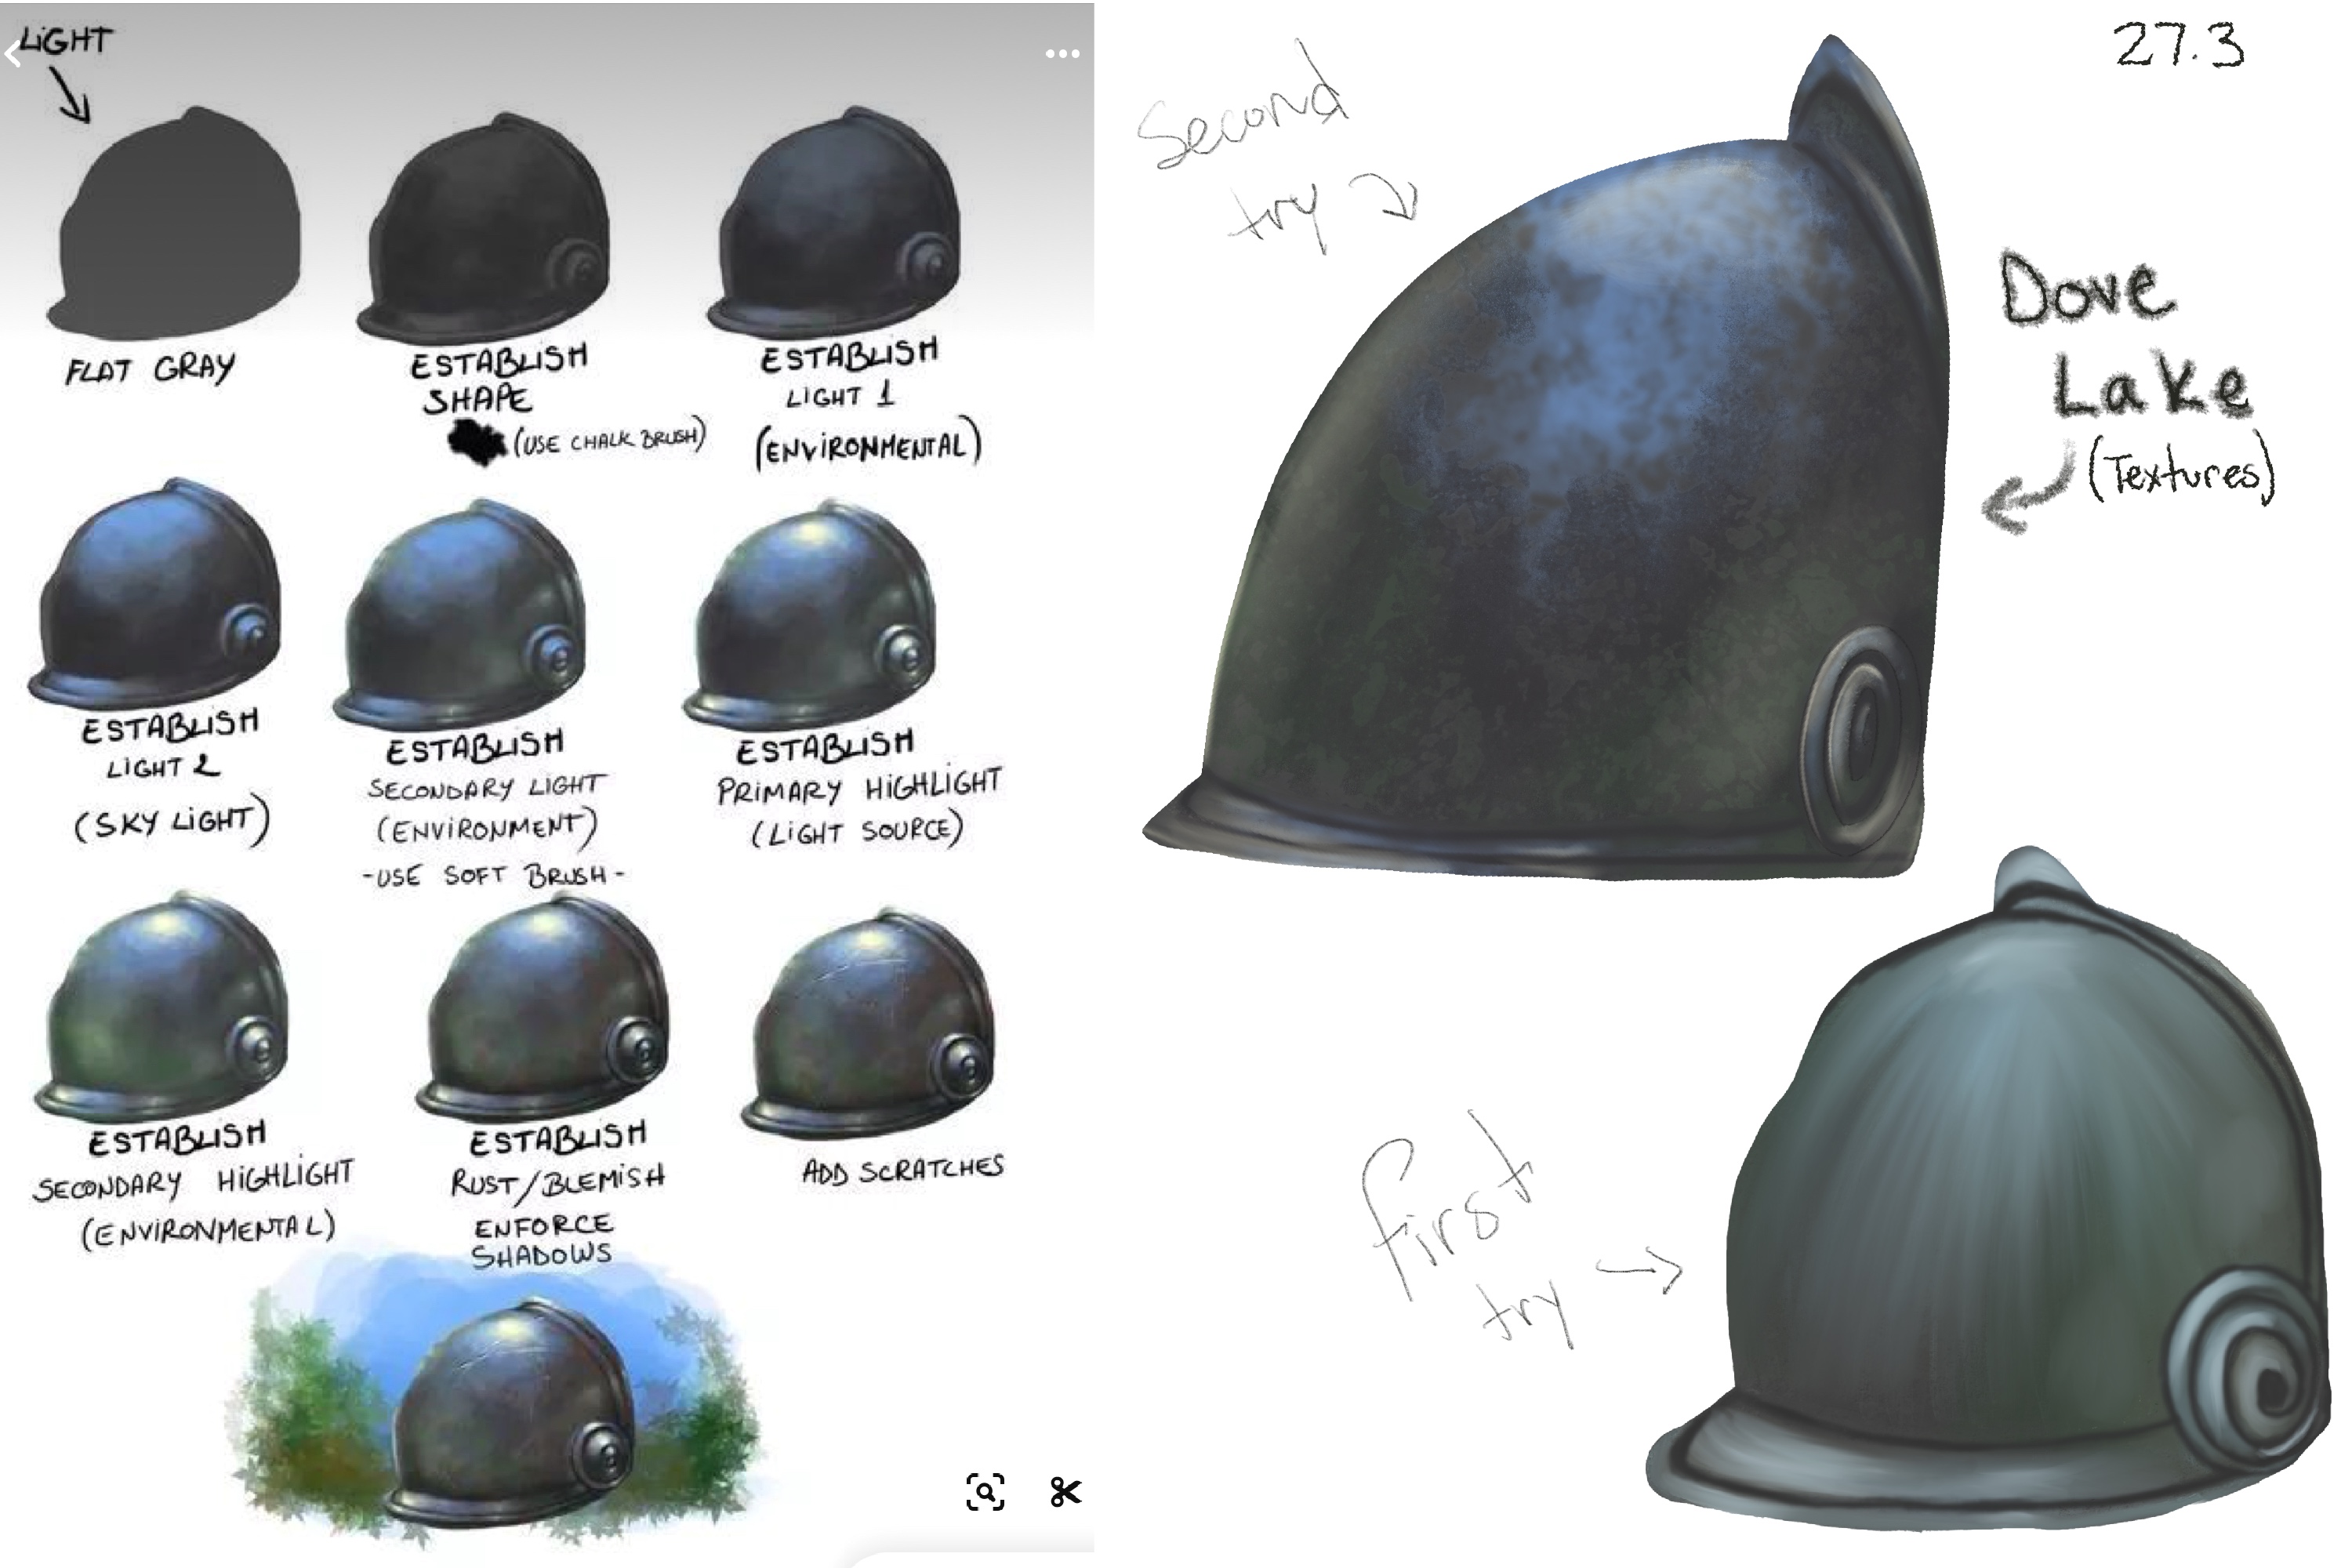
A big struggle with the instructions for these things is that it’s not clear how you’re meant to be painting. Not everyone suggests a brush type so I would do trial and error with different kinds of brushes to try to get a similar look. Then I would try to soften the edges between colours but if you smug too much it’s easy to lose texture and lighting.
Metal tutorial by MatesLaurentiu
Day 4 - Scales
I was pretty excited for scales, thinking I would learn a technique to make 100 diamonds look good all at once. Turns out, no, you must draw every diamond.
At least if you want to do a shiny, impressive close up.
This study took the longest of the 5. The base approach of wavy lines on a column is very good for getting the shape down, but after that it’s very much “draw the rest of the owl” feeling.
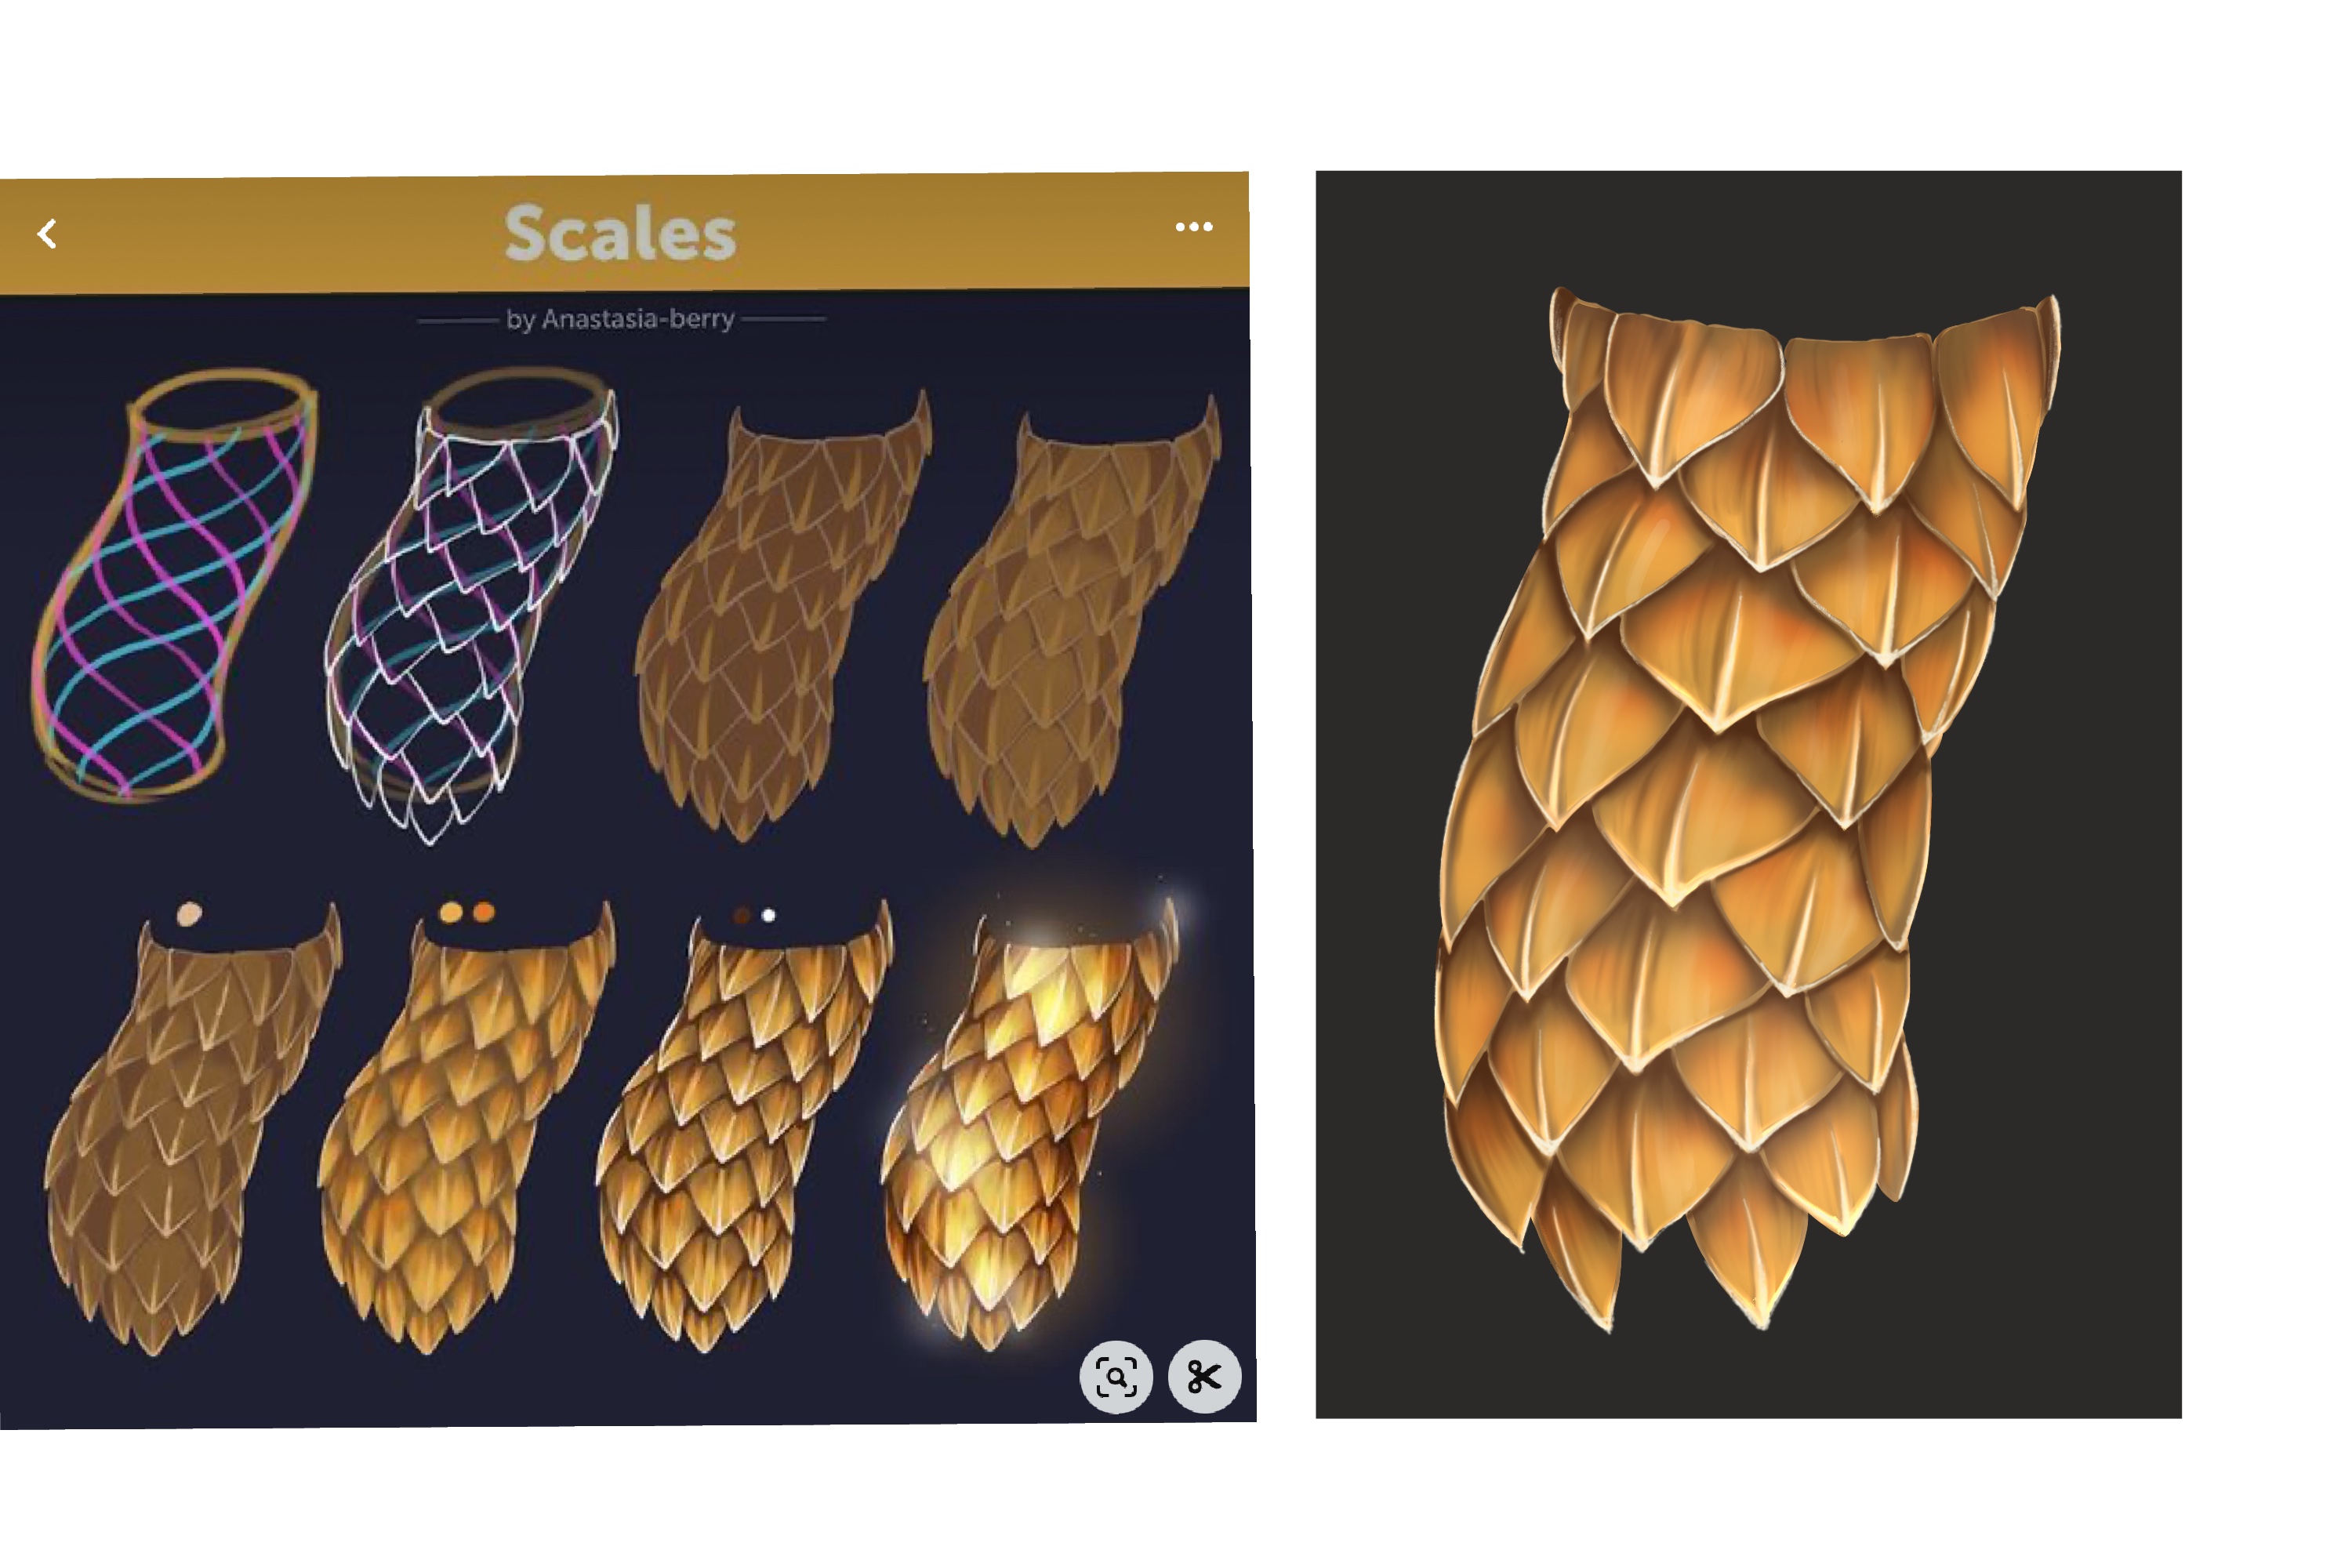
I lined every scale, painting in the base colour, did one round of highlights, a second round of highlights, 2 rounds of shadows, then added more detail base colours somewhere in between. Went back and fixed the shadows because they needed to be blended. Went back and fixed the highlights because they needed to be blended. All those steps repeated for each scale.
When I write it out it sounds terrible, but it can become relaxing. Once you know what you’re trying to accomplish with the specific step you’re on, it’s easier to turn your brain off and just do it for a while. So I could see a huge scaled creature project being pretty fun. But I don’t think it’s something I’ll do often.
Scales tutorial by Anastasia Deg aka AnastasiaBerry
Day 5 - Fur
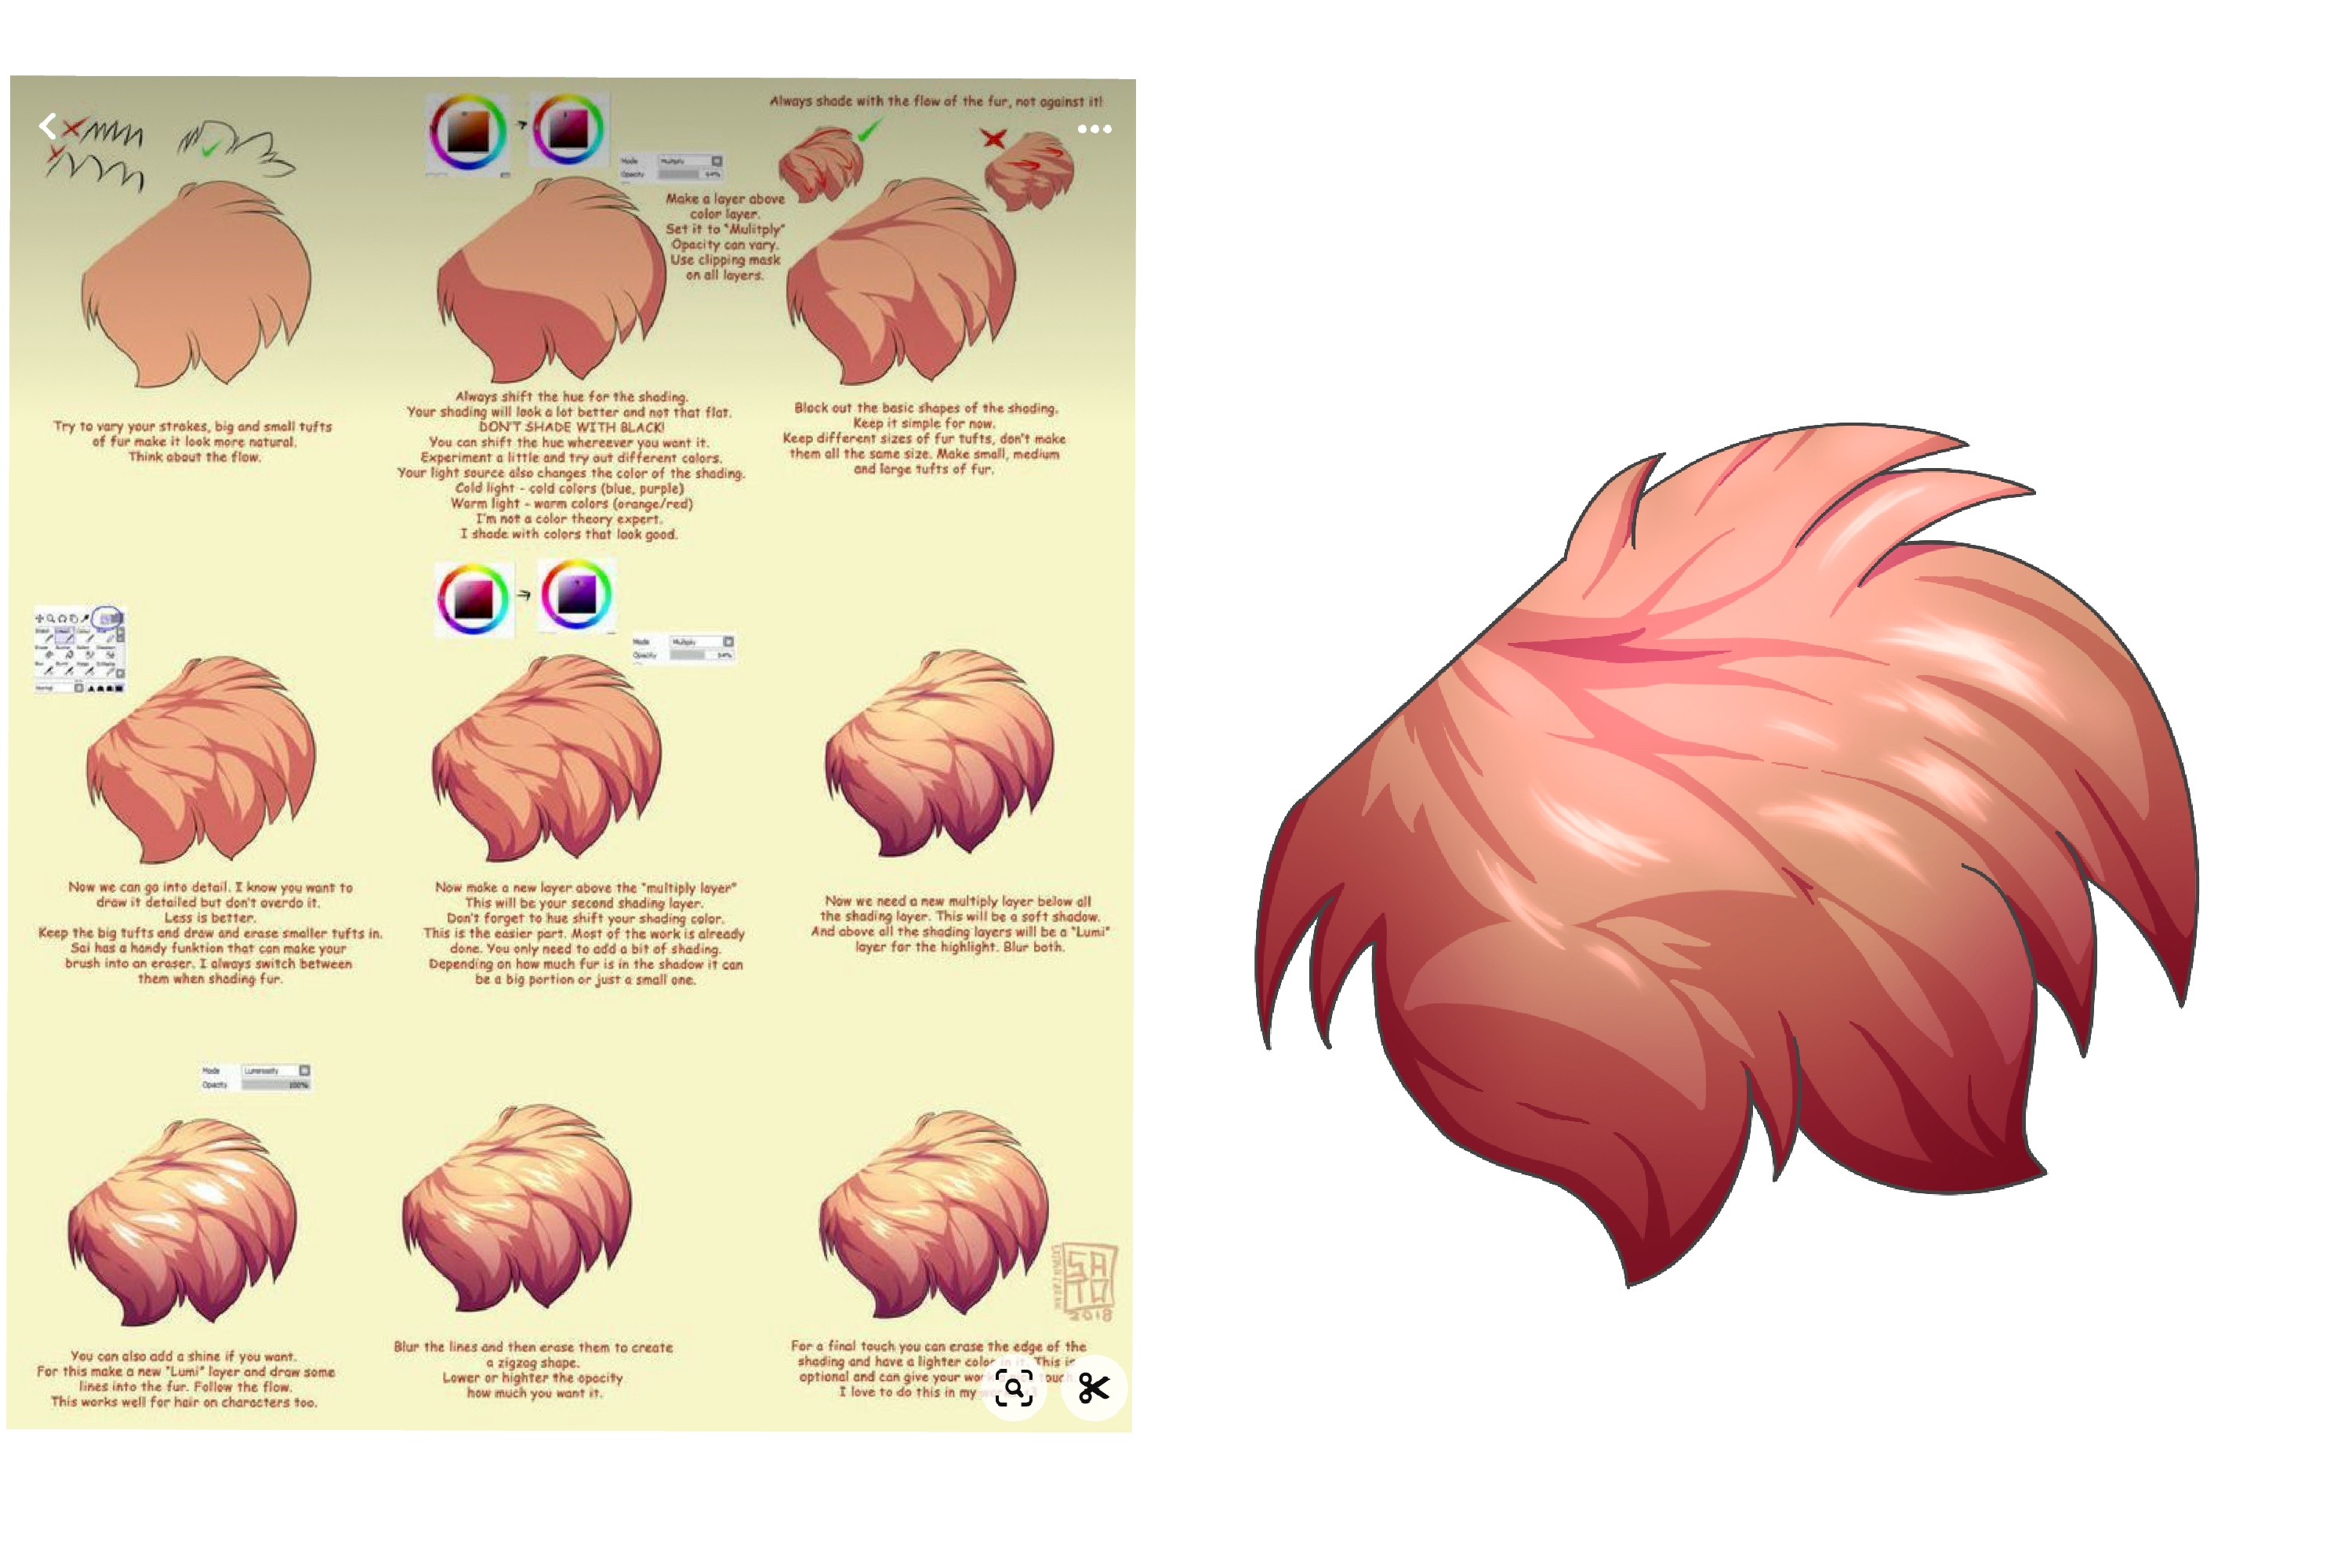
I didn’t love this fur tutorial at first glance but all the steps felt clear so I went with it. It wasn’t until I started to read the instructions and follow along that I noticed that the shading part of the approach focused on hue shifting which is a technique I want to get better at (hue shifting is where you change the hue instead of something else like value or saturation). This is a pretty good guide to hue shifting.
I wasn’t able to get the exact colours they have in the guide but I’m pretty happy with where my hues ended up. I feel like I lost some structure in the fur pieces but I think I understood the made shape takeaways that make the fur look dynamic.
Conclusion
This was a very fun and refreshing week. It was nice to focus on small little studies that could be completed, while feeling like I’m filling in some blanks in my brain. I’m going to keep collecting guides like this and try to do another small studies week before the end of the year.
Pinterest board link.
